

Introduction
cron Ubuntu Server is a time-based job scheduler in Unix-like operating systems that allows administrators to automate repetitive tasks, such as system backups, log rotations, and database maintenance, by executing commands or scripts at specific intervals. By leveraging the cron daemon (crond), you can ensure that critical system maintenance occurs without manual intervention, maintaining system health and operational consistency. This tutorial provides a comprehensive guide to managing scheduled tasks on an Ubuntu Server environment, focusing on precision, security, and observability.
Version note: These instructions target 7. Package versions and repository behavior may change in later releases, so verify upstream documentation before applying production changes.
What You’ll Learn
This guide explains Cron Ubuntu Server with clear, reproducible administration steps.
By the end of this technical guide, you will have mastered the following administrative competencies:
- Understanding the architecture and service lifecycle of the cron daemon on Ubuntu.
- Implementing scheduled tasks using both user-level and system-level crontabs.
- Configuring complex time expressions using the standard cron syntax.
- Verifying job execution through system logs and observable evidence.
- Troubleshooting common failure modes such as environment variable mismatches and permission errors.
- Hardening cron configurations using the principle of least privilege to prevent unauthorized task execution.
Prerequisites
Before you begin Cron Ubuntu Server, confirm the following prerequisites.
Before proceeding with the implementation of scheduled jobs, ensure your environment meets the following requirements:
- Operating System: A fresh or existing installation of Ubuntu Server (22.04 LTS or 24.04 LTS recommended).
- User Privileges: A user account with
sudoaccess for service management and system-wide configuration. - Basic Linux Proficiency: Familiarity with the command line interface (CLI), file permissions, and basic shell scripting.
- Network Connectivity: Active internet access to install or update system packages if necessary.
Lab Environment
The lab environment used to demonstrate Cron Ubuntu Server is summarized below.
For the purposes of this tutorial, the following environment is assumed. All commands should be executed within this context to ensure predictable results:
| Component | Specification |
|---|---|
| Host OS | Ubuntu Server 24.04 LTS |
| Kernel Version | 6.8+ (Standard Ubuntu Kernel) |
| Cron Implementation | Vixie Cron / Cronie (Standard Ubuntu Package) |
| Shell | Bash (Bourne Again Shell) |
| Privilege Model | Sudo-based administrative access |
Installation
Cron Ubuntu Server
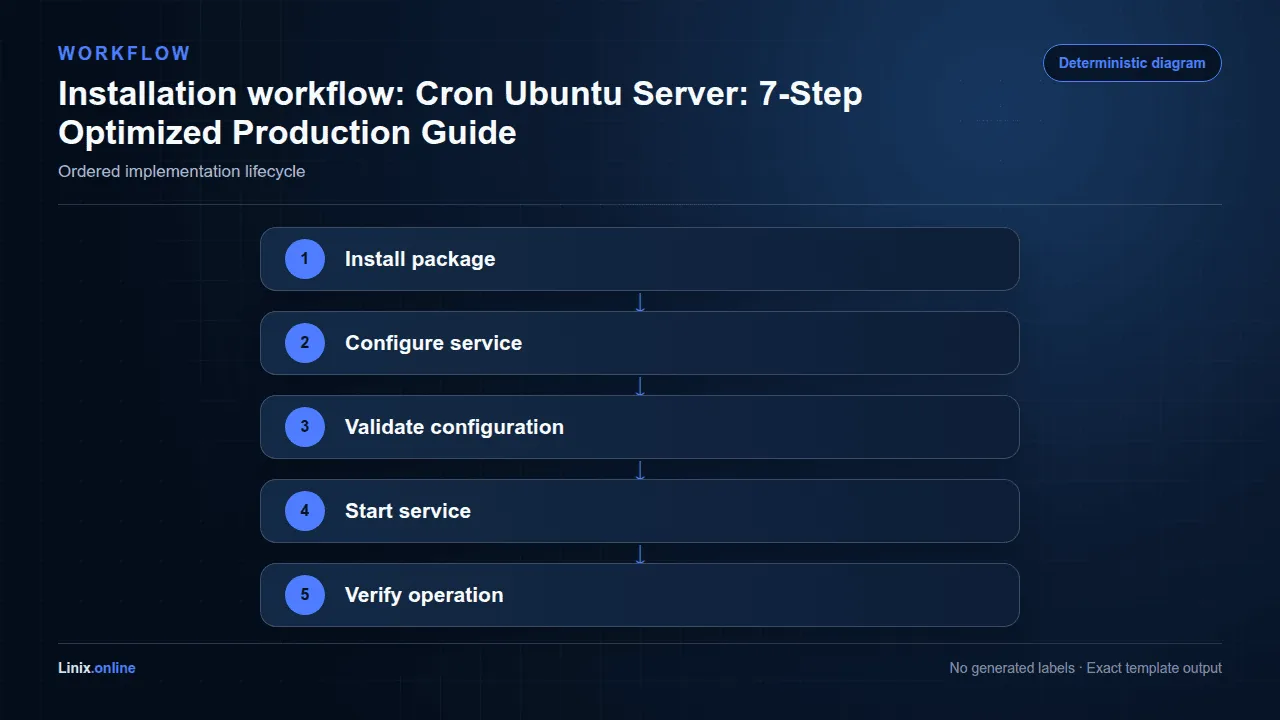
On a standard Ubuntu Server installation, the cron service is typically installed by default as part of the standard system utilities. However, in minimal or container-optimized environments, you may need to verify its presence or install it manually.
First, verify if the cron package is already present in your local package repository cache and installed on the system:
dpkg -l | grep cronIf the package is not found, use the apt package manager to install it. We rely on the official Ubuntu repositories to ensure package provenance and integrity. We do not use third-party repositories for core system utilities to maintain system stability and security.
sudo apt update
sudo apt install cron -y
Once installed, verify the package version to ensure compatibility with your system architecture:
dpkg -s cronAfter installation, ensure the service is enabled to start automatically during the system boot process (service lifecycle management):
sudo systemctl enable cron
sudo systemctl start cron
Verify that the service is active and running using the systemd unit status command:
systemctl status cronReview the command output before continuing, and confirm that it completed without errors.
Alternative Installation and Package Sources
Compare the distribution-supported package with the project’s official repository or installation method. Choose one source, document it, and avoid mixing package origins.
Before changing package sources, record the current package version and repository origin. This makes troubleshooting and rollback more predictable.
Expert Architecture Notes
Experienced administrators define service boundaries before tuning individual settings.
- Treat APT sources, packages, services, kernel, and bootloader as one managed dependency graph.
- Separate routine updates from release upgrades and document third-party repositories.
Record the package source and installed version used for Cron Ubuntu Server so future maintenance remains reproducible.
Configuration
After the initial setup, Cron Ubuntu Server requires the following configuration checks.
Cron configuration is handled through “crontabs” (cron tables). There are two primary levels of configuration: user-specific crontabs and system-wide crontabs. For security and least-privilege adherence, user-level crontabs are preferred for application-specific tasks, while system-wide directories are reserved for system maintenance.
User-Level Crontabs
User crontabs are stored in /var/spool/cron/crontabs/ and are managed via the crontab command. This method ensures that tasks run with the permissions of the specific user, adhering to the principle of least privilege.
To edit your current user’s crontab, execute:
crontab -eThe syntax for a crontab entry consists of five time/date fields followed by the command to be executed:
#.---------------- minute (0 - 59)
# |  ---------------- hour (0 - 23)
# |  |  --------------- day of month (1 - 31)
# |  |  |  ------------ month (1 - 12)
# |  |  |  |  --------- day of week (0 - 6) (Sunday to Saturday)
# |  |  |  |  |
# *  *  *  *  *  command to be executed
Example: To run a backup script every day at 02:30 AM:
30 02 * * * /usr/local/bin/backup_script.shReview the command output before continuing, and confirm that it completed without errors.
System-Wide Crontabs
System-wide tasks are located in /etc/crontab or within the directories /etc/cron.d/, /etc/cron.daily/, /etc/cron.weekly/, and /etc/cron.monthly/. Unlike user crontabs, system-wide crontabs require an additional field to specify the user under which the command runs.
Example /etc/cron.d/maintenance entry:
# Run log rotation every Monday at 4:00 AM as the root user
0 4 * * 1 root /usr/sbin/logrotate
Review the command output before continuing, and confirm that it completed without errors.
Cron Syntax Reference Table
| Field | Description | Allowed Values |
|---|---|---|
| Minute | Minute within the hour | 0 – 59 |
| Hour | Hour of the day | 0 – 23 |
| Day of Month | Day of the month | 1 – 31 |
| Month | Month of the year | 1 – 12 |
| Day of Week | Day of the week | 0 – 6 (0 is Sunday) |
Configuration and File Reference
| Item | Purpose |
|---|---|
/etc/schedule/ | Configuration or persistent data location to back up and review before changes. |
/var/log/schedule/ | Primary log location or log directory used during diagnosis. |
Paths can vary by distribution and installation method. Confirm each path on the target host before editing or automating it.
Upgrade and Maintenance Workflow
Use a staged maintenance process: capture the current version, back up configuration and data, review available packages, apply the update, and complete the same verification checks used after installation.
sudo apt update
sudo apt install --only-upgrade schedule
Run upgrade commands during a maintenance window. Review package changes before confirmation, then verify the service, logs, listening ports, and application behavior.
Expert Performance Guidance
Performance changes should follow measurement, not assumptions.
- Measure boot time, memory pressure, disk latency, and service startup before changing kernel or sysctl settings.
- Keep /boot and root filesystem capacity monitored before large upgrades.
Monitor the signals that prove whether the change helped or introduced risk.
- Monitor failed systemd units, pending reboots, disk space, and security updates.
Keep the final Cron Ubuntu Server configuration in version control and document every production-specific deviation.
Review Cron Ubuntu Server settings after major package or operating-system upgrades because defaults can change.
Verification
For upstream details and current platform guidance, consult the Ubuntu Server documentation.
Use these checks to verify that Cron Ubuntu Server completed successfully.
Successful operation must be verified through observable evidence. Relying on “silent success” is a common administrative error. You must confirm that the cron daemon is triggering the tasks and that the tasks are completing as expected.
Log Inspection
On Ubuntu, cron execution events are logged to the system journal. You can use journalctl to filter for cron-related messages. This provides auditability for when a job was triggered.
# View all cron-related logs
sudo journalctl -u cron
To monitor cron logs in real-time while testing a new job, use the follow command:
sudo journalctl -u cron -fReview the command output before continuing, and confirm that it completed without errors.
Output Redirection and Verification
By default, cron attempts to send the output of a command to the local mail spool. In most server environments, this is not configured or monitored. To verify the actual output or errors of your script, you must explicitly redirect stdout and stderr to a log file.
Recommended Implementation:
# Redirect both stdout and stderr to a specific log file
30 02 * * * /usr/local/bin/backup_script.sh >> /var/log/backup_task.log 2>&1
To verify the success of the script, check the content of the log file:
tail -n 20 /var/log/backup_task.logReview the command output before continuing, and confirm that it completed without errors.
A complete the service environment verification should cover the version, service state, logs, listening ports, and application response.
Troubleshooting
If the Linux setup does not work as expected, review these common causes.
When a scheduled job fails to execute, use the following diagnostic framework to isolate the failure mode.
Common Failure Modes
| Failure Mode | Likely Cause | Isolation/Diagnostic Command |
|---|---|---|
| Job never starts | Syntax error in crontab or service is stopped. | crontab -l and systemctl status cron |
| “Command not found” | Cron uses a minimal PATH environment. | Check script for absolute paths. |
| Permission Denied | Script lacks execute bit or user lacks permissions. | ls -l /path/to/script |
| Silent Failure | Script error occurred but output was not captured. | Implement 2>&1 redirection. |
Environment Variable Mismatches
A critical concept for beginners is that cron does not load your user’s full environment (like .bashrc or .profile). This means variables like PATH, HOME, or custom application variables are often missing.
The Fix: Always use absolute paths for every command within your scripts and crontab entries. Instead of python3 script.py, use /usr/bin/python3 /home/user/script.py.
Rollback and Recovery
If a new cron job causes system instability (e.g., high CPU usage or disk exhaustion), follow this recovery path:
- Identify the offending process using
toporhtop. - Kill the process if necessary using
sudo kill [PID]. - Remove the offending entry from the crontab using
crontab -e. - Verify the removal by checking the process list again.
Logs and Diagnostic Commands
When the service behaves unexpectedly, collect evidence before changing configuration. The following commands establish the installed version, service state, recent errors, and application-level health.
schedule --version
systemctl status schedule --no-pager
journalctl -u schedule -n 100 --no-pager
journalctl -u schedule --since '30 minutes ago'
systemctl status schedule --no-pager
Save the relevant output with timestamps. Compare the first error with later secondary failures, because the earliest failure usually identifies the root cause.
Rollback and Uninstall Strategy
A rollback should restore both configuration and compatible application data. Do not remove data directories until backups have been verified and the retention decision is documented.
sudo cp -a /etc/schedule /etc/schedule.backup
sudo systemctl restart schedule
sudo apt remove schedule
Package removal does not always delete configuration or persistent data. Inspect the package manager output, verify backups, and confirm whether a purge is appropriate before deleting retained files.
Automation and Routine Health Checks
Automate read-only health checks before automating changes. A scheduled check should report a failure without repeatedly restarting services or hiding the original error.
systemctl is-active schedule
journalctl -u schedule -n 20 --no-pager
For fleet management, place the same checks in Ansible, a monitoring agent, or a systemd timer. Keep credentials outside scripts and make maintenance jobs idempotent.
Common Production Failure Modes
| Expert concern | Operational guidance |
|---|---|
| Repository drift | PPAs can replace distribution packages and block upgrades. |
| Kernel regression | A new kernel may fail with storage, network, or DKMS modules. |
| Partial dpkg transaction | Interrupted package operations can leave packages unconfigured. |
Security Best Practices
Apply these security controls after the procedure is complete.
Scheduling tasks introduces a potential attack vector if not properly hardened. Follow these security boundaries to maintain a robust posture.
Principle of Least Privilege
Never run a task as root unless it is strictly necessary for system-level operations (like updating the kernel or managing network interfaces). If a task only needs to move files in a user’s home directory, run it as that specific user.
Permission Hardening
Ensure that any script being executed by cron is not world-writable. A world-writable script allows an attacker to inject malicious commands that will be executed with the privileges of the cron user.
# Secure a script: Owner can read/write/execute, others can only read/execute
chmod 755 /usr/local/bin/backup_script.sh
Review the command output before continuing, and confirm that it completed without errors.
Secret Handling
Never hard-code passwords, API keys, or sensitive credentials directly into a crontab entry or a script. Instead, use one of the following methods:
- Environment Files: Source a protected file within your script (e.g.,
source /etc/myapp/secrets.env) where permissions are set to600. - systemd Credentials: If using systemd timers as an alternative to cron, use
LoadCredential. - Vault Solutions: Use a dedicated secret management service to fetch credentials at runtime.
Auditability
Maintain an audit trail of all scheduled tasks. Regularly review /etc/cron.d/ and user crontabs to ensure no unauthorized tasks have been added. Use auditd if you require high-assurance monitoring of file access to sensitive scripts.
Production Readiness Checklist
- Back up configuration and application data before changes.
- Validate configuration before restarting or reloading the service.
- Monitor logs, disk usage, resource consumption, and service availability.
- Document rollback steps and test them outside production.
Record the tested version, configuration checksum, backup location, validation commands, and rollback owner in the change record before production rollout.
Expert Hardening Guidance
Apply controls in layers and verify that security changes do not break required service behavior.
- Use unattended-upgrades with monitoring and an explicit reboot policy.
- Prefer AppArmor profiles, least-privilege sudo rules, and minimal exposed services.
Avoid these common operational anti-patterns.
- Do not mix multiple repositories for the same core package without pinning.
Expert Recovery Strategy
Recovery planning must cover configuration, persistent state, dependencies, and the order in which services return.
- Retain previous kernels and console access.
- Save package selections, APT sources, and configuration backups before high-risk changes.
Automate repeatable checks and changes without hiding failures.
- Use cloud-init or Ansible for repeatable host configuration.
Frequently Asked Questions
What should I verify after this configuration?
Confirm the service, version, logs, network access, and security settings described above.
Why does my cron job work in my terminal but fail when run by cron?
This is almost always due to the difference in environment variables. Your interactive shell loads PATH, LD_LIBRARY_PATH, and other variables from .bashrc or .profile, whereas cron uses a very minimal environment. Always use absolute paths for all commands and binaries.
Can I run a job every 5 minutes?
Yes. The syntax for this is */5 * * * *. The asterisk with a slash indicates an interval.
How do I prevent multiple instances of the same cron job from running if the previous one hasn’t finished?
You can use the flock utility to create a lock file. For example: */5 * * * * /usr/bin/flock -n /tmp/myjob.lock /usr/local/bin/myjob.sh. The -n flag tells flock to fail immediately if the lock is already held.
Conclusion
Mastering the deployment is essential for any Linux administrator aiming to achieve operational efficiency and system reliability. By understanding the distinction between user and system-wide crontabs, adhering to the principle of least privilege, and implementing rigorous verification through logging and output redirection, you can automate complex workflows safely. Always remember that automation is a force multiplier, but it requires careful configuration and continuous monitoring to ensure that the automated tasks do not become a source of system instability or security vulnerabilities.
Related Tutorials
Need help? If you run into issues while following this guide, leave a comment with the command output and your Linux version.