

Introduction
The tar archive Ubuntu utility is a fundamental tool used by system administrators to bundle multiple files and directories into a single file, known as a “tarball.” This process, technically referred to as archiving, is essential for efficient data management, software distribution, and system backups on Ubuntu Server environments. Unlike simple compression, tar (Tape Archive) preserves critical filesystem metadata, including file permissions, ownership, and directory structures, ensuring that when data is restored, the original security context and file attributes remain intact.
Version note: These instructions target 7. Package versions and repository behavior may change in later releases, so verify upstream documentation before applying production changes.
In a production Ubuntu Server environment, using tar is critical for implementing a robust backup and recovery strategy. It allows administrators to create consistent snapshots of application data, configuration files, and system states. By combining archiving with compression algorithms like Gzip or Bzip2, you can significantly reduce the storage footprint of your backups, optimizing disk I/s and network bandwidth during off-site transfers. This tutorial provides a comprehensive guide to mastering tar archive Ubuntu workflows, from basic file bundling to advanced, secure backup procedures.
What You’ll Learn
This guide explains Tar archive Ubuntu with clear, reproducible administration steps.
This technical guide is designed to take a beginner from basic command usage to professional-grade archival management. By the end of this tutorial, you will be able to:
- Understand the fundamental architecture of the tar utility and its relationship with filesystem metadata.
- Execute basic archiving and extraction commands to manage individual files and entire directory trees.
- Implement advanced compression techniques using Gzip and Bzip2 to optimize storage utilization.
- Apply security hardening techniques to archives, ensuring that sensitive data remains protected via strict permission controls.
- Verify the integrity of archives to ensure successful recovery during disaster recovery scenarios.
- Troubleshoot common failure modes such as permission denied errors, disk space exhaustion, and archive corruption.
- Develop a professional backup and recovery lifecycle, including RPO (Recovery Point Objective) and RTO (Recovery Time Objective) considerations.
Prerequisites
Before proceeding with the implementation of tar archive Ubuntu workflows, ensure your environment meets the following requirements:
- Operating System: An active Ubuntu Server installation (22.04 LTS or 24.04 LTS recommended).
- User Privileges: A user account with
sudoaccess for managing system-level files and directory permissions. - Storage Capacity: Sufficient available disk space on the target filesystem to accommodate the generated archive files.
- Basic CLI Knowledge: Familiarity with navigating the Linux filesystem using
cd,ls, andmkdir. - Package Management: Understanding of how
aptworks, althoughtaris typically pre-installed in thebasesystem package set.
Lab Environment
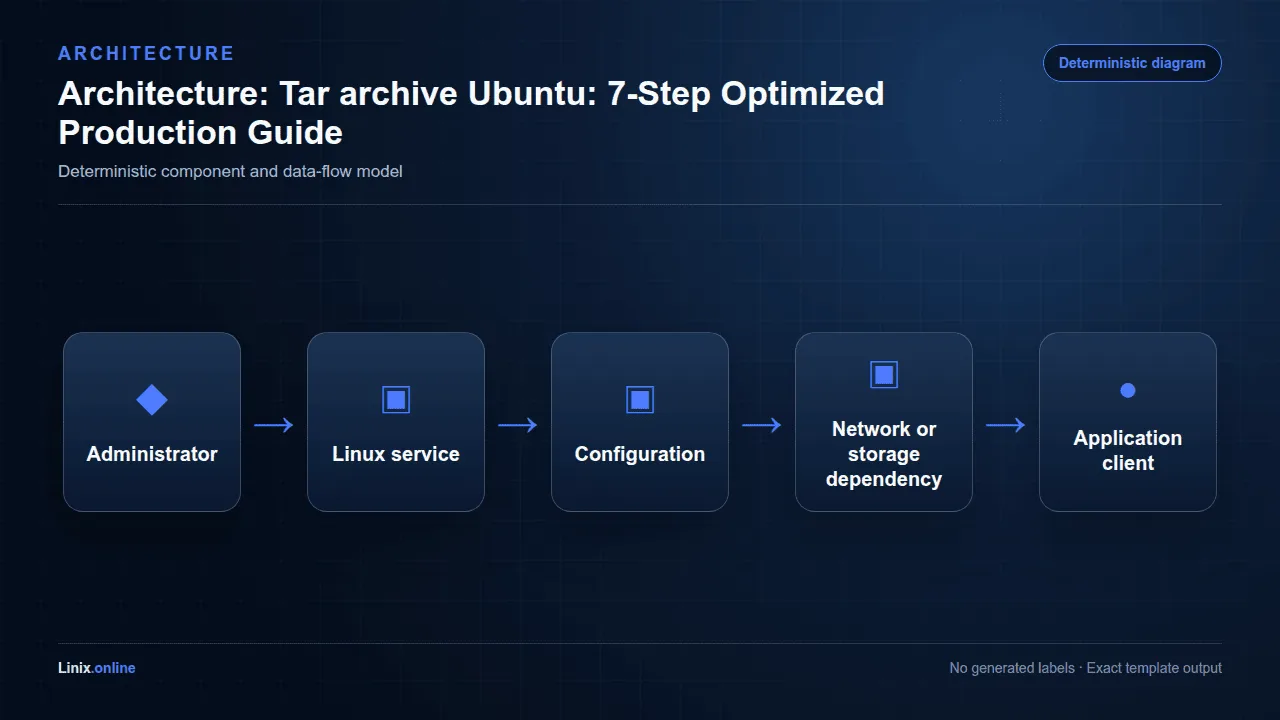
The lab environment used to demonstrate Tar archive Ubuntu is summarized below.
To ensure a safe and reproducible learning experience, we recommend setting up a controlled lab environment. This prevents accidental data loss on production systems while you practice destructive commands like archive extraction or permission modification.
The ideal lab setup includes:
- Primary Node: An Ubuntu Server instance (Virtual Machine or Cloud Instance) acting as the source of data.
- Secondary Node: A separate instance or a different directory partition to act as the backup repository, simulating off-site storage.
- Test Data: A directory containing a mix of file types (text, logs, configuration files) with varying ownership and permission levels to test metadata preservation.
For this tutorial, we will assume the following directory structure for our testing:
/home/admin/lab/
├── source_data/          # Files to be archived
│   ├── config/           # Configuration files
│   ├── logs/             # System logs
│   └── app_data/         # Application data
└── backups/              # Destination for tarballs
Review the command output before continuing, and confirm that it completed without errors.
Installation
Tar archive Ubuntu
On a standard Ubuntu Server installation, the tar utility is part of the tar package, which is a dependency of the ubuntu-standard meta-package. This means it is almost certainly already present on your system.
To verify the installation and check the version of the utility, execute the following command:
tar --version
If, for any reason, the command is not found, you can install it using the <code>apt</code> package manager. It is best practice to update your local package index before installing any new software to ensure you receive the latest stable version from the official Ubuntu repositories.
sudo apt update
sudo apt install tar -y
To verify the installation was successful and the package is correctly tracked by the system, use:
</pre><pre><code>
dpkg -l | grep tar
</code>
The output should show the version of <code>tar</code> and indicate that the package is in the <code>ii</code> (installed) state. This confirms the package provenance is verified via the official Ubuntu repository metadata.
Alternative Installation and Package Sources
Compare the distribution-supported package with the project’s official repository or installation method. Choose one source, document it, and avoid mixing package origins.
Before changing package sources, record the current package version and repository origin. This makes troubleshooting and rollback more predictable.
Expert Architecture Notes
Experienced administrators define service boundaries before tuning individual settings.
- Treat APT sources, packages, services, kernel, and bootloader as one managed dependency graph.
- Separate routine updates from release upgrades and document third-party repositories.
Record the package source and installed version used for Tar archive Ubuntu so future maintenance remains reproducible.
Configuration
The <code>tar</code> utility does not rely on a persistent daemon or a complex configuration file like a database service. Instead, its behavior is configured through command-line flags that dictate the operation mode (create, extract, list, or append) and the compression algorithm used.
Archiving Modes and Flags
The core functionality of tar archive Ubuntu is driven by specific flags. Understanding these is crucial for correct implementation:
| Flag | Function | Operational Context |
|---|---|---|
| <code>-c</code> | Create | Creates a new archive file. |
| <code>-x</code> | Extract | Extracts files from an existing archive. |
| <code>-v</code> | Verbose | Provides detailed output of the files being processed. |
| <code>-f</code> | File | Specifies the name of the archive file (must be the last flag). |
| <code>-z</code> | Gzip | Filters the archive through the gzip compression utility. |
| <code>-j</code> | Bzip2 | Filters the archive through the bzip2 compression utility. |
| <code>-t</code> | List | Lists the contents of an archive without extracting it. |
Compression Strategies
Choosing the right compression algorithm is a trade-off between speed and storage efficiency. In a production lifecycle, you must balance the Recovery Time Objective (RTO)—how fast you can decompress and restore—against the cost of storage.
- Gzip (-z): The industry standard for general-purpose compression. It offers a high speed-to-compression ratio, making it ideal for frequent, automated backups where rapid restoration is required.
- Bzip2 (-j): Provides significantly higher compression ratios than Gzip, resulting in smaller files. However, it is much more CPU-intensive and slower to both compress and decompress. Use this for long-term retention of data that is rarely accessed.
Security and Permissions Configuration
When creating archives that contain sensitive system configurations (like <code>/etc/shadow</code> or SSH keys), you must ensure the resulting archive does not become a security vulnerability. A common mistake is creating an archive that is world-readable.
To implement least-privilege controls, you should explicitly set the permissions of the archive file immediately after creation. For example, if you are backing up application data, the archive should only be readable by the backup user or the root user.
</pre><pre><code>
# Create the archive
sudo tar -czvf /home/admin/lab/backups/app_data_backup.tar.gz /home/admin/lab/source_data/app_data
# Restrict permissions to the owner only (Read/Write)
sudo chmod 600 /home/admin/lab/backups/app_data_backup.tar.gz
This ensures that even if the backup directory is misconfigured, the sensitive data within the tarball remains protected from unauthorized access.
Configuration and File Reference
| Item | Purpose |
|---|---|
/etc/archive/ | Configuration or persistent data location to back up and review before changes. |
/var/log/archive/ | Primary log location or log directory used during diagnosis. |
Paths can vary by distribution and installation method. Confirm each path on the target host before editing or automating it.
Upgrade and Maintenance Workflow
Use a staged maintenance process: capture the current version, back up configuration and data, review available packages, apply the update, and complete the same verification checks used after installation.
sudo apt update
sudo apt install --only-upgrade archive
Run upgrade commands during a maintenance window. Review package changes before confirmation, then verify the service, logs, listening ports, and application behavior.
Expert Performance Guidance
Performance changes should follow measurement, not assumptions.
- Measure boot time, memory pressure, disk latency, and service startup before changing kernel or sysctl settings.
- Keep /boot and root filesystem capacity monitored before large upgrades.
Monitor the signals that prove whether the change helped or introduced risk.
- Monitor failed systemd units, pending reboots, disk space, and security updates.
Keep the final Tar archive Ubuntu configuration in version control and document every production-specific deviation.
Review Tar archive Ubuntu settings after major package or operating-system upgrades because defaults can change.
Verification
For upstream details and current platform guidance, consult the Ubuntu Server documentation.
Use these checks to verify that Tar archive Ubuntu completed successfully.
A backup is considered unverified until a successful restore test is completed. In professional system administration, “successful operation” is not defined by the absence of error messages during the tar -c command, but by the ability to reconstruct the original state perfectly.
Content Inspection
Before extracting an archive, you should inspect its contents to verify that the expected files and directory structures are present. This is a critical step in the verification phase of a deployment or recovery lifecycle.
# List contents of a Gzip-compressed archive
tar -ztvf /home/admin/lab/backups/app_data_backup.tar.gz
The output should show the file paths and their associated permissions. If you see unexpected files or missing directories, the archive is invalid for your recovery objectives.
Integrity and Metadata Verification
To ensure the archive has not suffered from bit rot or corruption during transfer, you should use checksums. While <code>tar</code> itself does not perform a cryptographic hash, you can combine it with <code>sha256sum</code> to create a verifiable provenance for your backups.
# Generate a checksum for the archive
sha256sum /home/admin/lab/backups/app_data_backup.tar.gz > /home/admin/lab/backups/app_data_backup.tar.gz.sha256

# Verify the checksum later
sha256sum -c /home/admin/lab/backups/app_data_backup.tar.gz.sha256
A successful verification will output: <code>/home/admin/lab/backups/app_data_backup.tar.gz: OK</code>. If the output indicates a mismatch, the archive is corrupted and must be discarded and recreated.
The Restore Test
The final and most important verification step is the restore test. You must extract the archive into a temporary “sandbox” directory and compare it against the original source to ensure metadata (ownership, timestamps, permissions) was preserved.
</pre><pre><code>
# Create a sandbox for testing
mkdir -p /home/admin/lab/sandbox
# Extract the archive into the sandbox
tar -xzvf /home/admin/lab/backups/app_data_backup.tar.gz -C /home/admin/lab/sandbox
# Verify ownership and permissions match the original
ls -la /home/admin/lab/sandbox/app_data
</code>
A complete Tar archive Ubuntu verification should cover the version, service state, logs, listening ports, and application response.
Save the successful the deployment validation output as a baseline for later incident comparison.
Troubleshooting
Even with careful execution, several failure modes can occur when using the service environment. Below are the most common issues and their isolation/resolution paths.
Common Failure Modes
| Error/Issue | Likely Cause | Isolation & Resolution |
|---|---|---|
| <code>tar: Removing leading ‘/’ from member names</code> | Absolute paths are being used. | This is a safety feature. <code>tar</code> strips the leading slash to prevent accidental overwriting of system files during extraction. Use relative paths for safer archiving. |
| <code>tar: Error opening archive: No such file or directory</code> | Incorrect file path or typo. | Verify the destination path using <code>ls</code>. Ensure the directory exists before attempting to write the archive. |
| <code>tar: Permission denied</code> | Insufficient privileges for source or destination. | Use <code>sudo</code> if accessing system directories, or check the ownership of the destination directory using <code>ls -ld</code>. |
| <code>No space left on device</code> | The target partition is full. | Check disk usage with <code>df -h</code>. Use compression (<code>-z</code> or <code>-j</code>) or target a larger partition. |
| <code>Unexpected EOF in archive</code> | Archive corruption or incomplete transfer. | The archive was likely interrupted during creation or transfer. Re-run the creation process or check the network integrity during transfer. |
Isolation and Recovery
When a failure occurs, follow these steps to isolate the cause:
- Verify Source Integrity: Ensure the files you are trying to archive are not currently being locked or modified by another process (e.g., a running database).
- Check Resource Constraints: Use <code>du -sh</code> to check the size of the source directory and <code>df -h</code> to check the available space on the destination.
- Test in Isolation: Attempt to create a small archive of a single file to determine if the issue is with the <code>tar</code> utility itself or the specific data set.
- Rollback Plan: If an extraction fails and you are performing an upgrade, always ensure you have a verified, uncorrupted backup of the original state to allow for a safe rollback.
Logs and Diagnostic Commands
When the service behaves unexpectedly, collect evidence before changing configuration. The following commands establish the installed version, service state, recent errors, and application-level health.
archive --version
systemctl status archive --no-pager
journalctl -u archive -n 100 --no-pager
journalctl -u archive --since '30 minutes ago'
systemctl status archive --no-pager
Save the relevant output with timestamps. Compare the first error with later secondary failures, because the earliest failure usually identifies the root cause.
Rollback and Uninstall Strategy
A rollback should restore both configuration and compatible application data. Do not remove data directories until backups have been verified and the retention decision is documented.
sudo cp -a /etc/archive /etc/archive.backup
sudo systemctl restart archive
sudo apt remove archive
Package removal does not always delete configuration or persistent data. Inspect the package manager output, verify backups, and confirm whether a purge is appropriate before deleting retained files.
Automation and Routine Health Checks
Automate read-only health checks before automating changes. A scheduled check should report a failure without repeatedly restarting services or hiding the original error.
systemctl is-active archive
journalctl -u archive -n 20 --no-pager
For fleet management, place the same checks in Ansible, a monitoring agent, or a systemd timer. Keep credentials outside scripts and make maintenance jobs idempotent.
Common Production Failure Modes
| Expert concern | Operational guidance |
|---|---|
| Repository drift | PPAs can replace distribution packages and block upgrades. |
| Kernel regression | A new kernel may fail with storage, network, or DKMS modules. |
| Partial dpkg transaction | Interrupted package operations can leave packages unconfigured. |
When diagnosing the Linux setup, capture the earliest error before restarting services or changing configuration.
Security Best Practices
Apply these security controls after the procedure is complete.
Managing archives on an Ubuntu Server requires strict adherence to security principles to prevent data leakage and privilege escalation.
Principle of Least Privilege
Never run <code>tar</code> as the <code>root</code> user unless absolutely necessary (e.g., when archiving <code>/etc</code>). When creating archives for application data, use the specific service account that owns the data. This ensures that the archive inherits the correct ownership context and prevents the creation of files that are overly permissive.
Secret Handling and Data Masking
Archives often inadvertently capture sensitive information such as <code>.env</code> files, SSH private keys, or database credentials. To harden your archival process:
- Use Exclude Patterns: Use the <code>–exclude</code> flag to prevent sensitive files from being included in general backups.
- </pre><pre><code># Example: Exclude all.key files and the.env file
sudo tar -czvf backup.tar.gz /path/to/data –exclude=’*.key’ –exclude=’.env’Review the command output before continuing, and confirm that it completed without errors.
- Encryption: For highly sensitive data, do not rely solely on
tar. Pipe the output through an encryption tool likegpgto ensure the archive is encrypted at rest. # Encrypting a tarball with GPG tar -czv /path/to/data | gpg -c > backup.tar.gz.gpgReview the command output before continuing, and confirm that it completed without errors.
Auditability and Retention
A professional backup strategy must include an audit trail. Maintain logs of when backups were created, who initiated them, and the results of the integrity checks. Additionally, implement a retention policy to manage disk space. Do not keep archives indefinitely; define a lifecycle (e.g., keep daily backups for 7 days, weekly backups for 4 weeks) and automate the deletion of expired archives to prevent disk exhaustion.
Production Readiness Checklist
- Back up configuration and application data before changes.
- Validate configuration before restarting or reloading the service.
- Monitor logs, disk usage, resource consumption, and service availability.
- Document rollback steps and test them outside production.
Record the tested version, configuration checksum, backup location, validation commands, and rollback owner in the change record before production rollout.
Expert Hardening Guidance
Apply controls in layers and verify that security changes do not break required service behavior.
- Use unattended-upgrades with monitoring and an explicit reboot policy.
- Prefer AppArmor profiles, least-privilege sudo rules, and minimal exposed services.
Avoid these common operational anti-patterns.
- Do not mix multiple repositories for the same core package without pinning.
Expert Recovery Strategy
Recovery planning must cover configuration, persistent state, dependencies, and the order in which services return.
- Retain previous kernels and console access.
- Save package selections, APT sources, and configuration backups before high-risk changes.
Automate repeatable checks and changes without hiding failures.
- Use cloud-init or Ansible for repeatable host configuration.
Frequently Asked Questions
What should I verify after this configuration?
Confirm the service, version, logs, network access, and security settings described above.
How do I extract a tar file into a specific directory?
Use the -C (capital C) flag followed by the target directory path. For example: tar -xzvf archive.tar.gz -C /target/directory.
What is the difference between -z and -j flags?
The -z flag uses Gzip compression, which is fast and widely compatible. The -j flag uses Bzip2 compression, which provides better compression ratios but is slower and uses more CPU.
Can I add a file to an existing tar archive?
Yes, using the -r (append) flag. However, note that you cannot append files to a compressed archive (e.g.,.tar.gz). You must first decompress the archive, add the file, and then re-compress it.
How can I see the contents of a tar file without extracting it?
Use the -t flag. For example, tar -tvf archive.tar will list the contents in a format similar to ls -l.
Conclusion
Mastering the the deployment utility is a cornerstone of Linux system administration. By understanding the nuances of compression algorithms, metadata preservation, and security hardening, you can transform a simple file-bundling tool into a powerful component of your disaster recovery and data management strategy. Always remember that an archive is only as useful as its last successful restore test; therefore, prioritize verification and integrity checks as much as the creation process itself. Implement these best practices to ensure your Ubuntu Server environments remain resilient, secure, and recoverable.
Related Tutorials
Need help? If you run into issues while following this guide, leave a comment with the command output and your Linux version.